
I know the feeling of tripping over a stray jack stand while trying to find a flathead screwdriver. It makes you want to close the garage door and forget the project entirely.
A solid layout changes everything about how you work on your weekend DIY tasks. I want to help you set up a space that actually makes sense for your specific tools and flow.
We need to look at how every square inch of your concrete floor contributes to your sanity. Moving a heavy workbench once is enough to realize that planning on paper saves your back later.
Designing Your Ideal Workspace: Planning the Perfect Setup
I’ve spent years moving heavy workbenches and dragging extension cords across cold concrete floors just to find a layout that actually works. Most people assume you need a massive three car garage to have a professional shop, but that isn’t the case at all.
Success starts with understanding how you move between your tools and where your materials will sit during a long project. I always tell my friends that twenty minutes of planning with a tape measure saves two hours of frustration later.
Your layout needs to be a reflection of your specific hobbies rather than a copy of a magazine photo. Whether you are rebuilding an engine or crafting a dining table, the floor plan dictates your speed and safety.
I want to help you visualize a space where every tool has a home and you never have to move a mountain of boxes to reach a saw. Let’s look at the most effective ways to arrange your gear for maximum efficiency and comfort.
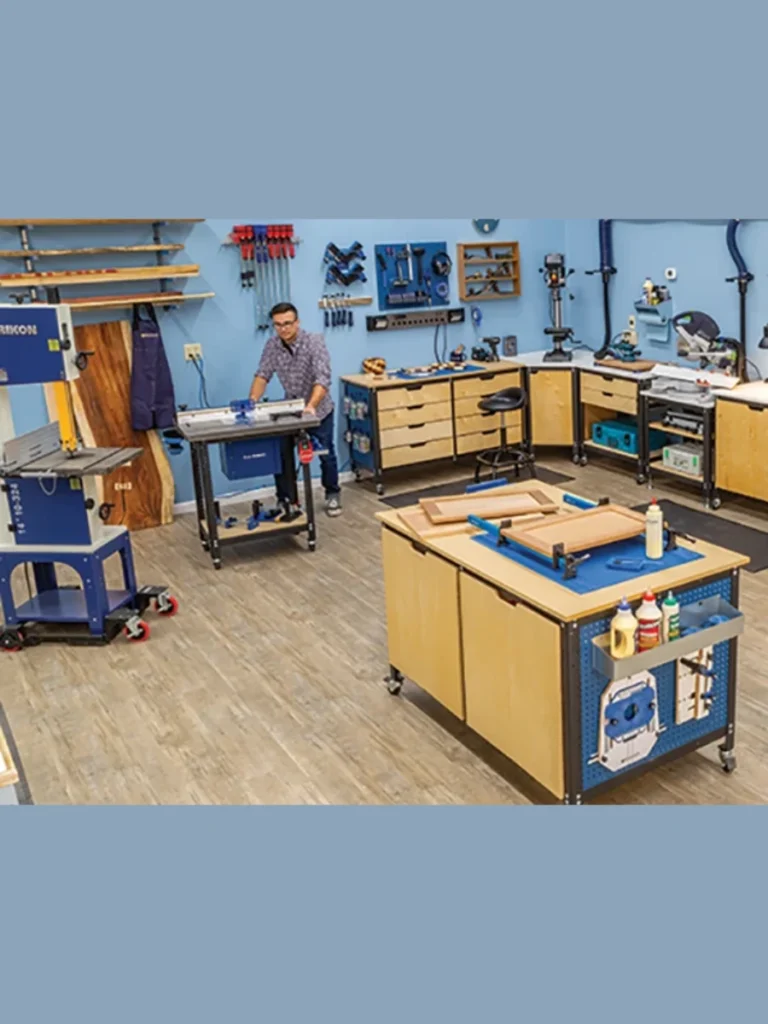
1. The Mobile Station Layout for Small Spaces

I find that putting everything on heavy duty locking casters is the only way to survive in a single car garage. You can push the table saw into the corner when you need to park the car inside.
This setup relies on “flip top” stands that hold two different tools on one footprint. I personally love having my planer and sander share a single rolling cabinet to save precious floor space.
You should keep your main assembly table at the same height as your stationary tools. This allows the table to act as an outfeed support when you are cutting long boards or sheets.
I suggest using a folding workbench that mounts directly to the wall for the ultimate space saver. You simply swing it up when you need to work and drop it down to clear the bay.
2. The Professional Perimeter Workshop Design
I prefer this layout if you have a larger two car garage and don’t plan on parking vehicles inside. You install continuous cabinetry and work surfaces along three walls to create a massive U shaped zone.
This design gives you specific areas for different tasks like metalworking, woodworking, and electronics. I like keeping the center of the floor open so I can build large furniture pieces without hitting walls.
You can install upper cabinets above the entire run to keep your chemicals and hardware out of sight. I think a clean visual environment helps you focus better on the precision parts of your build.
Standard kitchen depth counters work well here but I recommend building custom deep benches for the miter saw. This ensures the fence aligns perfectly with the rest of your long-running wall storage system.
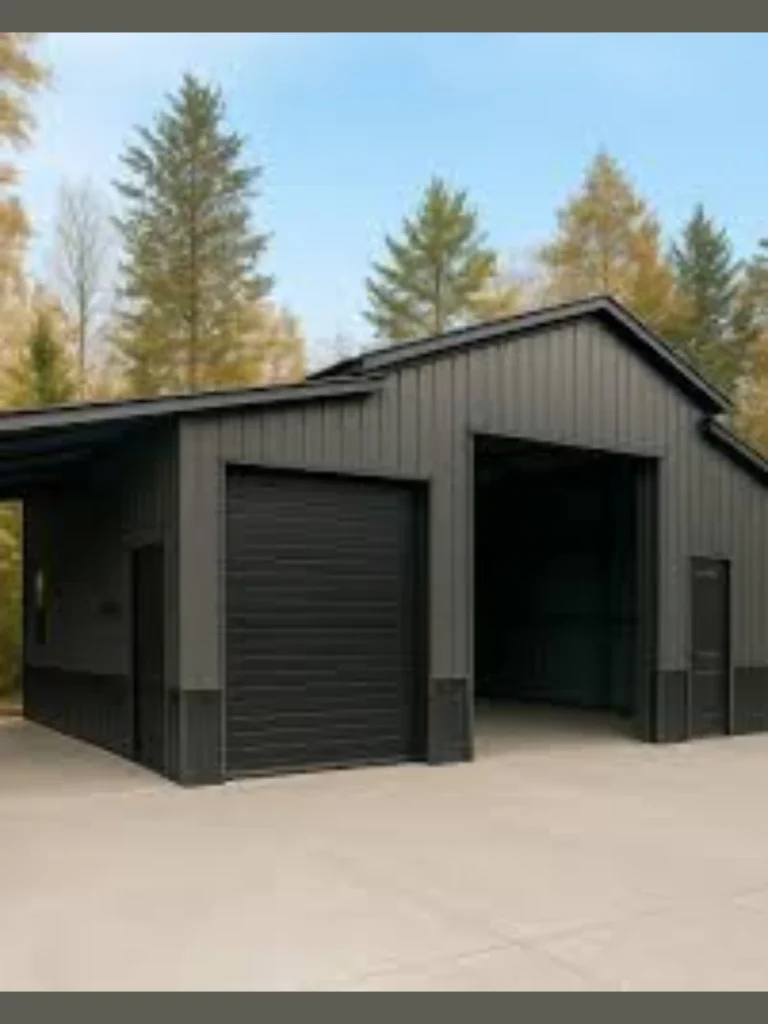
3. The Dedicated Automotive Repair Zone

I designed this layout for the person who spends more time under a hood than behind a desk. You need a wide-open center lane with reinforced flooring to handle the weight of a floor jack or lift.
Storage cabinets should stay at the front of the garage to keep the sides clear for opening car doors. I find that a rolling tool chest is your best friend here so you can bring the tools to the fender.
You should plan for a specific fluid station that holds oils, coolants, and your drain pans. I always place this near the garage door to make it easier to haul old oil to the recycling center.
Lighting is the most vital part of this specific layout since you are often working in shadows. I suggest adding low-level LED bars on the walls to illuminate the sides of the vehicle while you work.
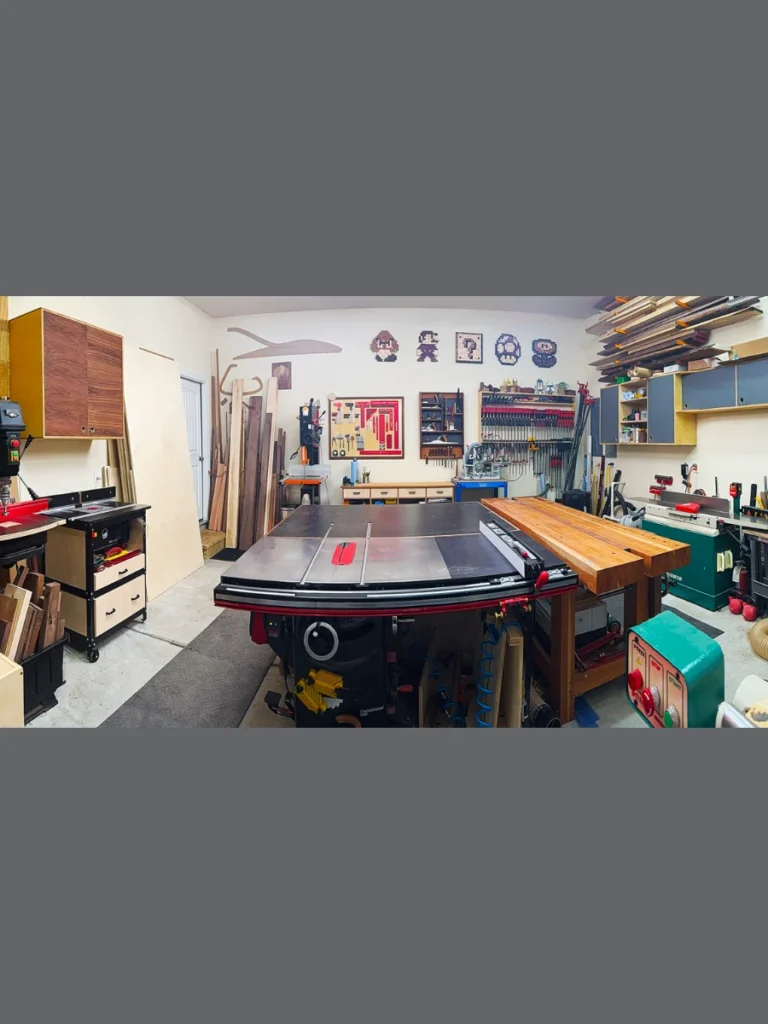
4. The Woodworking Center Island Plan
I think the center island layout is the gold standard for serious woodworkers who have a large shop. You place your table saw and assembly table right in the middle to allow 360-degree access to your work.
This allows you to handle full sheets of plywood without bumping into the garage door or storage shelves. I put my dust collector in the corner and run pipes under the floor to keep the paths clear.
The surrounding walls stay open for lumber racks and specialized stations like a drill press or band saw. I find this keeps the heavy dust making activities centered in one spot for easier cleanup at night.
You should include a dedicated finishing area in one of the far corners away from the sawdust. I use a portable curtain system to keep overspray from landing on my expensive walnut or oak projects.
5. The Shared Multi Purpose Utility Layout
I often see neighbors struggling to balance a home gym with a functional repair shop. This layout splits the garage into two distinct zones using a heavy floor to ceiling curtain or a row of lockers.
One side stays dedicated to your heavy machinery while the other remains clean for your treadmill or yoga mats. I find that this division prevents metal shavings from ending up in your workout shoes later.
You should use interlocking rubber tiles for the gym side and a durable epoxy for the workshop section. This visual cue helps family members understand where the “dirty” work ends and the “clean” zone begins.
I suggest using wall-mounted racks for your gym equipment to keep the floor clear for occasional projects. This setup lets you pull a project into the gym space if you ever need extra assembly room.
6. The Precision Electronics and Tech Bench
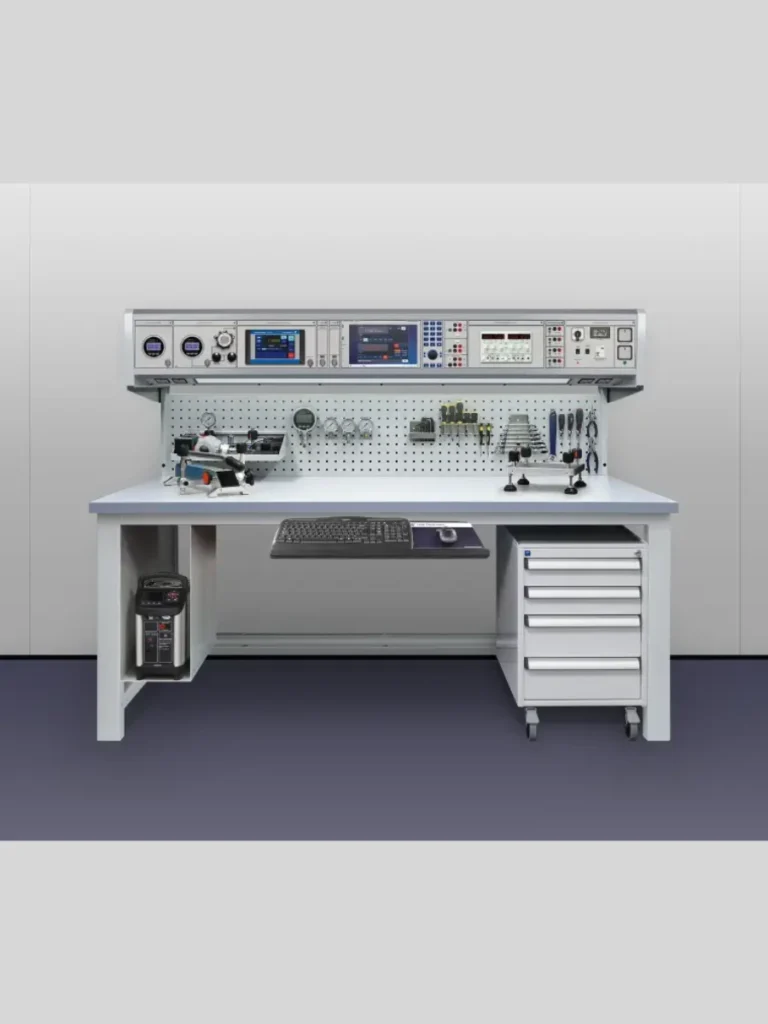
I think every modern garage needs a dedicated corner for soldering, 3D printing, and small-scale assembly. This layout uses a standard height desk instead of a standing workbench to allow for comfortable seating.
You need to install an anti static mat and plenty of overhead lighting to see tiny components. I personally use a magnifying lamp on a swing arm to save my eyes during long repair sessions.
The wall behind this bench should feature small bin storage for capacitors, screws, and assorted hardware. I find that keeping these small parts separate from your heavy hammers and saws prevents a lot of frustration.
I recommend placing this station furthest from your wood cutting area to protect sensitive electronics from fine dust. A simple plastic cover for your 3D printer adds an extra layer of safety when things get messy.
7. The Tandem Garage Long Wall Design

I realize that long, narrow tandem garages are a nightmare to organize if you don’t use the length wisely. This layout places a massive, 20 foot workbench along one side wall to take advantage of the depth.
You can create a linear workflow where the project starts at the back and moves toward the door. I like placing my loudest tools at the very back of the garage to keep the noise away from the street.
The opposite wall should remain completely flat using slatwall panels or pegboards for thin tool storage. This ensures you still have enough width to walk past a parked vehicle without scratching the paint.
I suggest installing a series of overhead LED panels that run the entire length of the long workbench. This eliminates shadows and makes the narrow space feel much larger and more professional than it actually is.
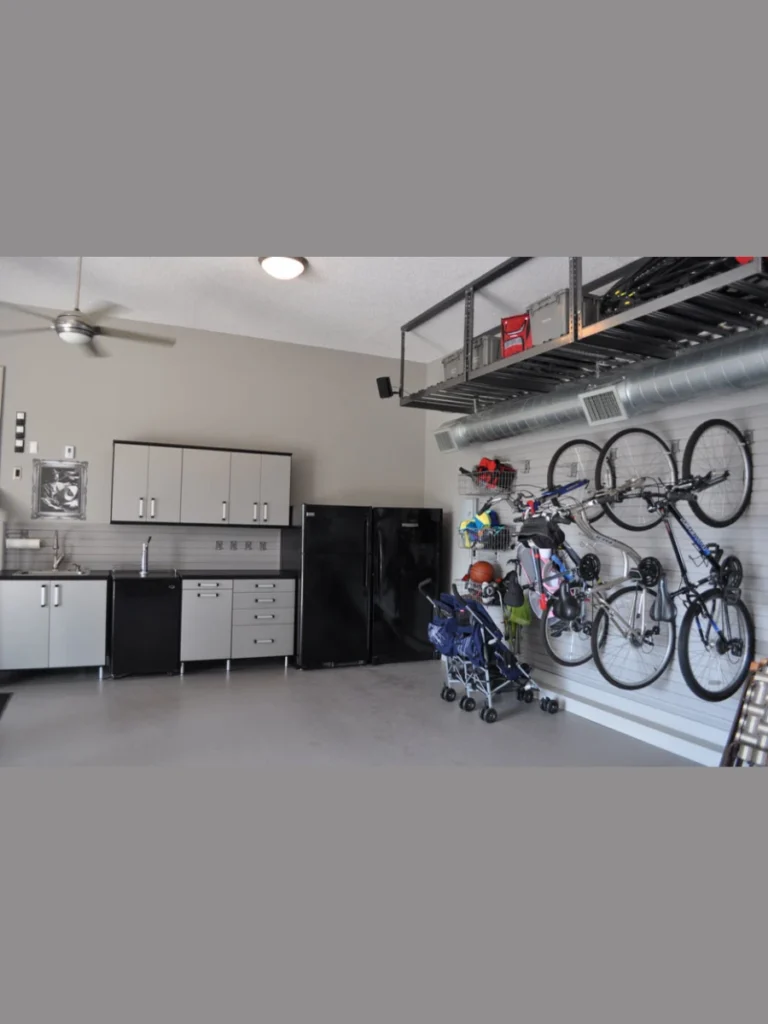
8. The Vertical Storage Wall Framework
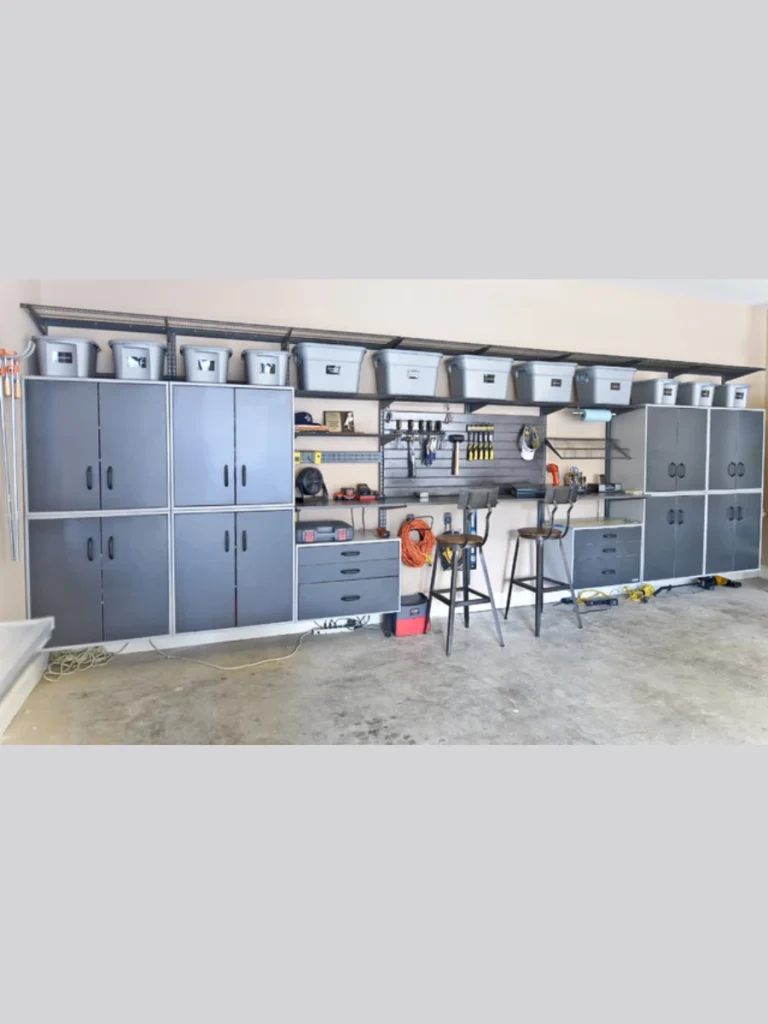
I find that the biggest mistake people make is letting their floor become a graveyard for lawn tools. This layout moves every single item onto the walls using heavy-duty tracks and industrial shelving.
By lifting your air compressor and shop vac onto sturdy wall platforms, you reclaim several square feet of floor. I think this makes the garage feel much less claustrophobic when you are working on a big project.
You should group your tools by frequency of use, keeping the most common items at chest height. I put my seasonal items like snow shovels or camping gear on the highest shelves near the ceiling.
I recommend using clear plastic bins for all your wall-mounted storage so you can see exactly what is inside. This prevents you from buying a second box of nails just because you couldn’t find the first one.
9. The L Shaped Corner Efficiency Hub
I find that the L shaped layout is the most natural fit for homeowners who still need to park a large SUV. You utilize the back corner and one side wall to create a concentrated work zone.
This design allows you to pivot between two different work surfaces without taking more than a single step. I personally use one side for my permanent vise and the other for my miter saw station.
You should place your rolling scrap wood bin under the corner junction where the two benches meet. This dead space is usually wasted, so tucking a bin there keeps your floor clear and your offcuts organized.
I recommend installing a corner mounted shop fan to keep air moving across both wings of your workspace. This setup ensures you stay cool while working in the deepest part of the garage during the summer.
10. The Heavy Metalworking and Welding Bay

I think metalworkers need a specialized layout that focuses on fire safety and heavy load capacities. This plan features a thick steel top workbench and a dedicated area for an anvil or metal bender.
You should keep this station near the garage door to ensure sparks and fumes can escape quickly. I always keep a fire extinguisher within arm’s reach of the welding table for peace of mind while working.
The walls in this section should be bare concrete or covered in fire rated cement board rather than wood. I find that keeping flammable materials at least five feet away from the grinding zone is a smart move.
I suggest using magnetic tool strips on the wall to hold your pliers, clamps, and welding magnets. This keeps your heavy metal tools organized and prevents them from cluttering up your main welding surface.
11. The Clean Room Painting and Finishing Booth

I realize that getting a mirror like finish on a project is impossible if your garage is full of floating dust. This layout uses a section of the garage equipped with a temporary PVC pipe frame and plastic sheeting.
You can pull the plastic curtains closed when it is time to spray your lacquer or oil based finishes. I like adding a box fan with a high quality filter to create a slight positive pressure environment inside.
The lighting in this zone needs to be positioned at various heights to catch any runs or drips in the paint. I find that side mounted lights reveal imperfections that overhead shop lights usually hide from your eyes.
I recommend a dedicated drying rack with narrow slats to hold your freshly painted pieces while they cure. Keeping these items inside the “booth” prevents hair or bugs from landing on your wet project.
12. The Overhead Loft and Mezzanine Workshop
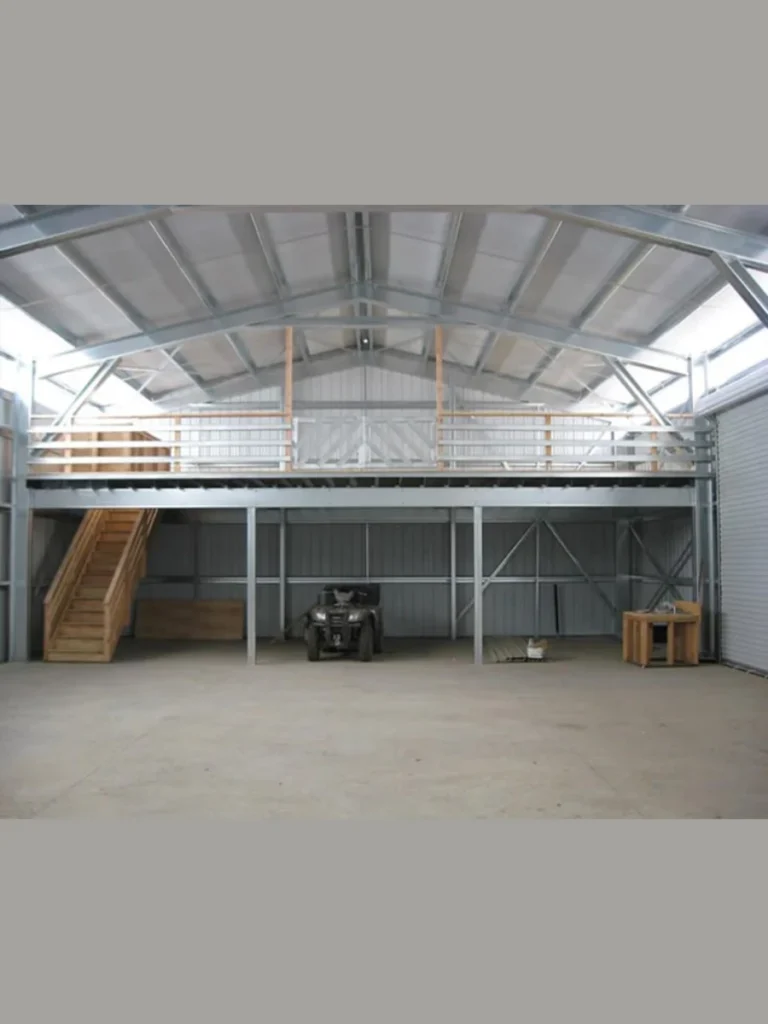
I think the only way to go when you run out of floor space is to start building toward the rafters. This layout involves building a sturdy mezzanine level for long-term storage or a small office space.
You can keep your heavy machinery on the ground floor and move your lighter assembly tasks upstairs. I find that this separation of space makes the garage feel like a professional multi story studio.
You must ensure your ceiling height is at least twelve feet before attempting to build a functional loft. I personally used this setup to keep my messy sanding station away from my clean assembly area.
I suggest using a pulley operated storage rack for bulky items like ladders or kayaks above your main bench. This keeps your most expensive floor real estate open for the projects that actually pay the bills.
Essential Infrastructure for Every Layout
| Feature | Recommendation | Reason |
| Lighting Color | 5000K to 6500K | Provides natural daylight for accuracy |
| Floor Coating | Polyaspartic or Epoxy | Resists chemicals and makes cleanup easy |
| Air Quality | HEPA Filtration | Protects your lungs from fine particles |
| Power Access | Ceiling Drop Reels | Prevents tripping over extension cords |
Expert Tips for Planning Your New Layout
- Tape the Floor: Use blue painter’s tape to outline your benches on the concrete before you buy anything.
- Check the Swing: Ensure your table saw fence and miter saw arms have full clearance from the walls.
- Map the Outlets: I always place a power strip every four feet along my main workbench for convenience.
- Think About Trash: Leave a dedicated spot for a large shop vacuum and a trash can near the exit.
Conclusion
I believe that the best garage workshop layout is the one that actually gets you excited to start a project. Whether you have a tiny corner or a massive three car bay, the goal is to make the space work for your specific hobby.
Take the time to measure your equipment and think about how you move through the room during a build.
Start with one small section and build your dream shop piece by piece as your budget allows. Your garage is the heart of your home’s creative energy, so treat it with the respect it deserves.
I can’t wait to hear how these layouts help you turn your messy garage into a professional grade workspace.
FAQs
I recommend a poly aspartic coating or high-quality epoxy because they resist oil stains and are very easy to sweep.
You generally need at least three feet of clearance on all sides to safely feed large pieces of lumber
Most people find that 34 to 36 inches is comfortable for general DIY and woodworking tasks.
I suggest using a shop vacuum with a HEPA filter and a cyclone separator to catch the majority of fine dust
You should always check with your local building department before adding a structural loft or mezzanine level