


Finding the top 20 Halloween acrylic nails should bring pure excitement instead of salon panic. I spent years fighting chipped polishes and snapped tips hours before party guests arrived at my front door.
Why Choosing the Best Halloween Acrylic Nails Matters Every October
A sturdy set of Halloween acrylic nails protects your festive manicure from accidental breaks and chips. I spent hours repairing cracked tips right before evening trick-or-treat gatherings. You deserve dependable seasonal nails that look sharp and withstand every holiday party.
1. Top Ghostly French Tip Acrylic Nails
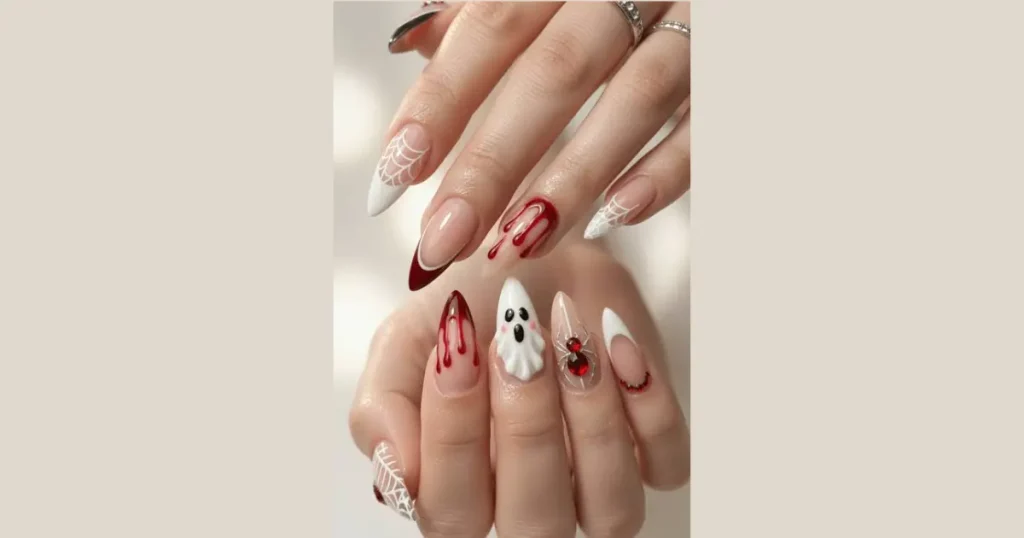
A sheer nude base paired with floating white specters gives classic acrylic French tips a playful autumn update. I paint a sheer neutral pink base first, then use a rounded liner brush to shape curved white silhouettes along the tips. Two quick dots of black polish create wide eyes that give each nail a friendly, spooky charm.
Applying a glossy gel top coat seals the white edges and stops your ghost tips from peeling off early. I cure my clear sealant under a fast LED lamp so my nail tips never snag against thick autumn knit sweaters. You achieve a clean aesthetic that looks polite at work while celebrating the holiday in style.
Fine detailing tools help you control small curved lines across the acrylic apex. I tried freehanding ghosts with a giant bottle brush years ago and ended up with clumsy white smears on my thumb. A tiny dotting tool gives you neat circles that look identical to salon work.

2. Affordable Vampire Blood Drip Stiletto Acrylics
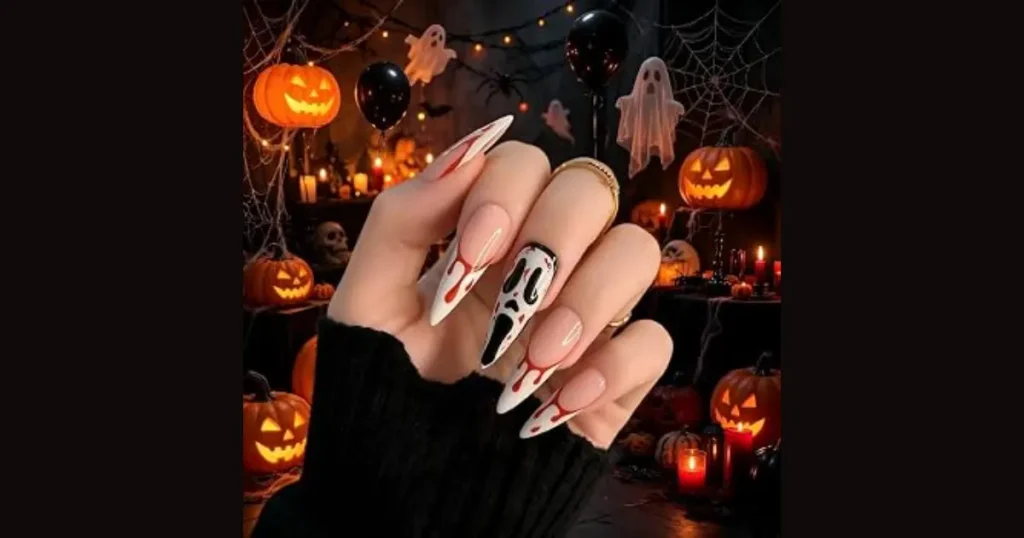
Vivid crimson drips trickling down a nude acrylic base create a dramatic gothic horror style in minutes. I place small rounded drops of dark red polish near the cuticle line with a metal dotting tool, then drag thin lines down toward the free edge. This simple technique mimics fresh theatrical blood without requiring steady freehand painting skills.
Choosing a dark wine polish with a jelly finish adds rich dimension under dim party lighting. I steer clear of bright tomato reds because darker wine shades look classier and hide minor painting wobbles. You walk away with an eye-catching Halloween manicure that costs only pennies to make at home.
Stiletto acrylic tips enhance the sharp, menacing vibe of this horror manicure. I once used a bright neon red that looked like melted cherry popsicle syrup instead of spooky vampire blood. Dark burgundy gel polish gives you that authentic vintage vampire look every single time.
3. Best Rustic Pumpkin Patch Coffin Acrylic Nails
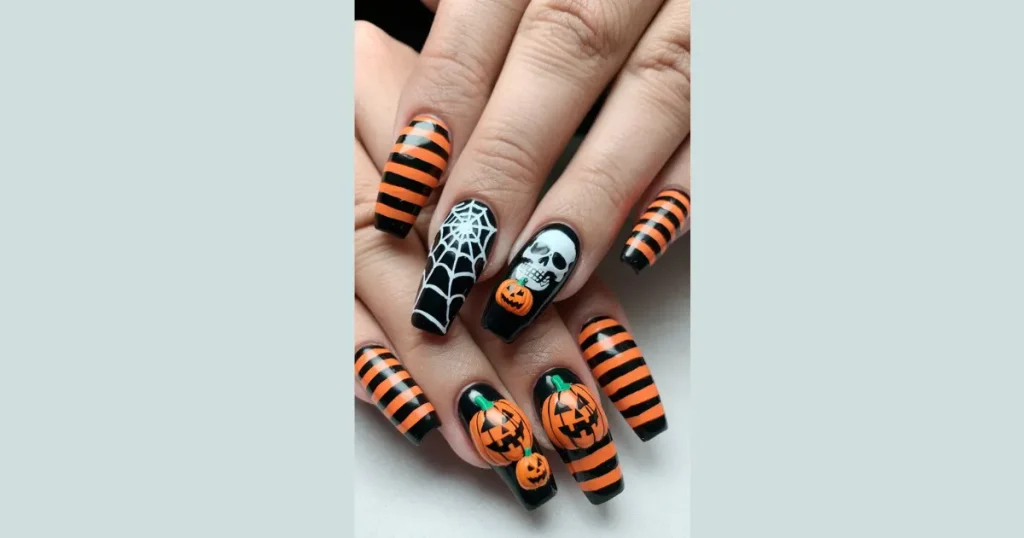
Warm terracotta orange polish paired with fine green vine accents gives your acrylic coffin nails a cozy autumn aesthetic. I paint three nails in a rich burnt orange hue and reserve my accent fingers for cute round pumpkin illustrations. A thin toothpick helps you draw gentle vertical ridges that make the tiny pumpkins look dimensional.

A matte top coat softens the bright orange tone and produces a modern velvety finish that lasts for days. I always choose matte sealant because it hides surface imperfections and resists greasy snack fingerprints during parties. The design pairs beautifully with oversized flannel shirts and warm pumpkin spiced drinks.
Coffin acrylics provide a flat, wide surface that makes hand-painting small pumpkins surprisingly easy. I ruined my first pumpkin set by applying thick acrylic beads that looked like heavy orange lumpy pebbles. Keeping your paint layers flat preserves the crisp shape of your coffin extensions.
4. Classic Black Cat Silhouette Almond Acrylics
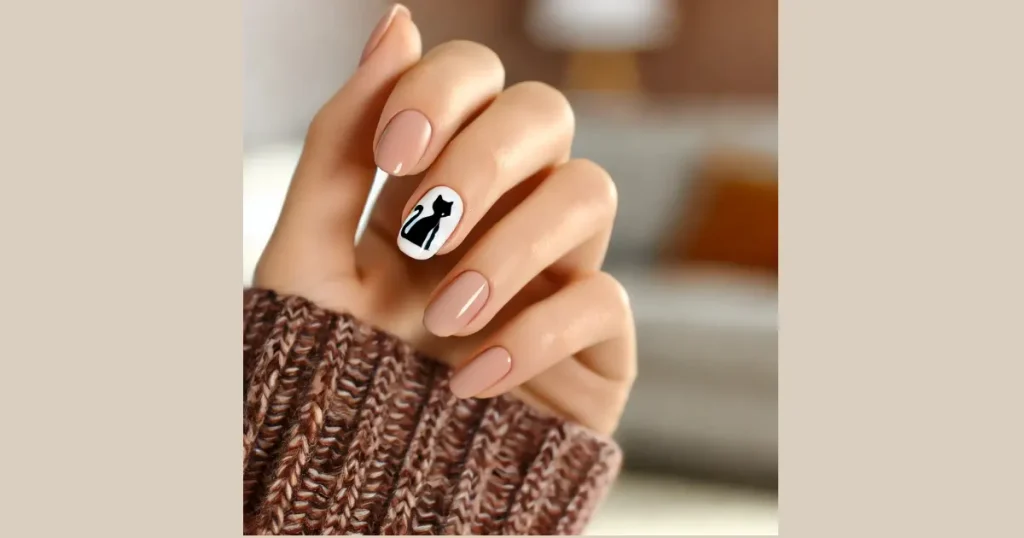
Sleek black cat outlines on a milky neutral acrylic base offer an unmistakable witchy style that never feels tacky. I swipe two tiny triangular ears atop a rounded black arch near the nail base using a fine liner brush. Adding two yellow cosmetic dots creates piercing feline eyes that gleam under evening streetlights.
Fine detailing brushes from a local craft shop give you much better control than standard nail polish brushes. I tried painting cat whiskers without a proper liner brush once and turned my nail into an unrecognizable ink blot. Using the proper miniature tool keeps your lines crisp, sharp, and salon quality.
Almond acrylic nails give your fingers an elongated look that suits mystical feline silhouettes. I buff the surface with a fine grit block before painting so the black gel grips without pooling. A high-shine top coat seals the feline artwork against daily typing and chores.

5. Chic Cobweb Negative Space Acrylic Nails
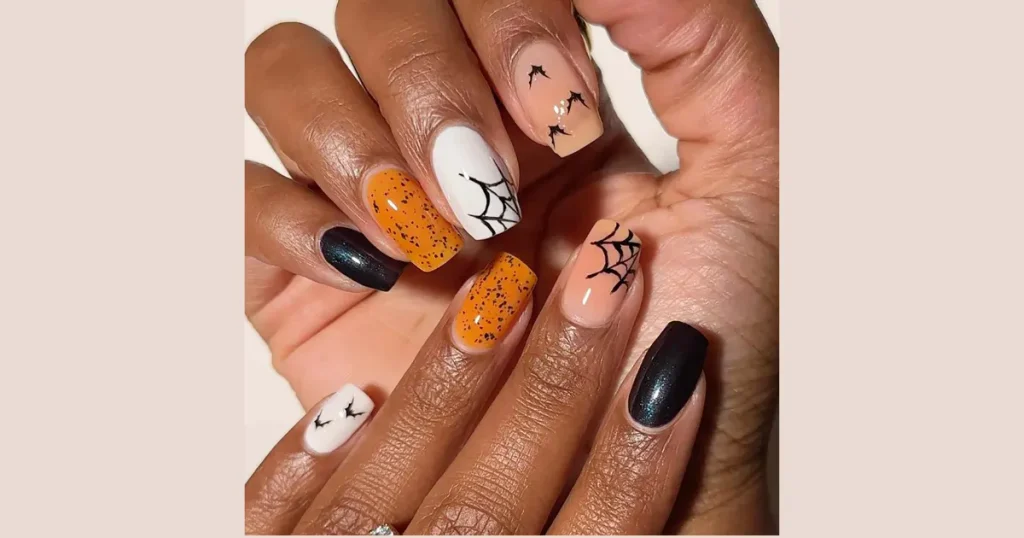
Delicate white spiderwebs painted over bare, buffed acrylics produce a high-contrast graphic look without heavy polish layers. I begin by drawing three straight white lines radiating from one corner of the nail, then connect them with curved arcs. This negative space approach lets your clear acrylic base shine through while keeping the design lightweight.
A quick swipe of clear base coat prevents your natural nail bed from yellowing before you draw your white web lines. I love this specific style because new nail growth remains invisible, letting you wear the design all through November. You get an edgy seasonal manicure that holds up against daily chores and busy holiday schedules.
A striper brush helps you paint crisp web strands without shaky hand tremors. I used to skip the clear base coat until black pigment stained my natural nails bright yellow for three weeks. Prepping the nail surface with a dehydrator keeps your line work clean and durable.
6. Top Matte Black Jack-o’-Lantern Acrylic Nails
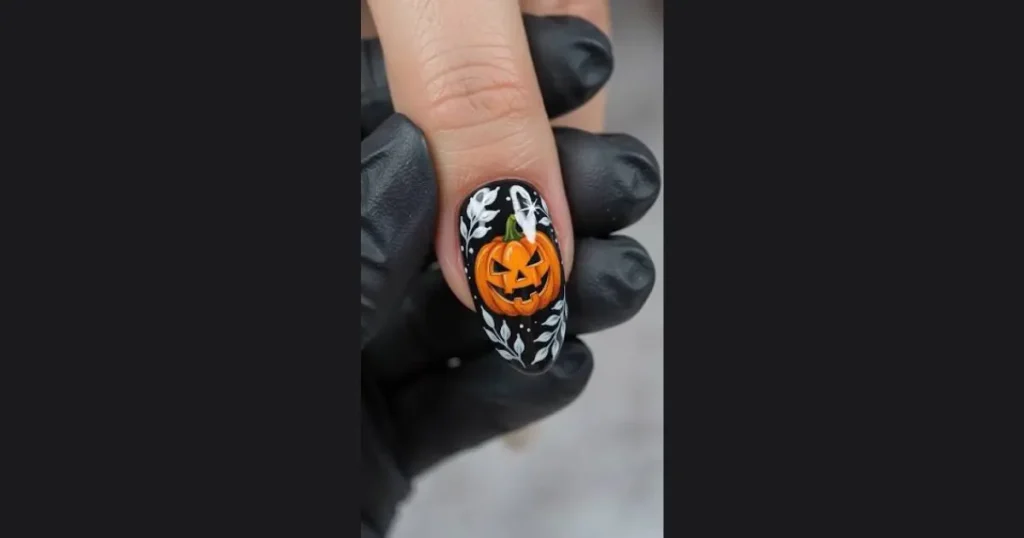
A smooth black acrylic base topped with carved orange pumpkin smiles turns dark nails playful and spooky. I swipe a velvet matte black polish across my nails and paint miniature glowing grins with an ultra-thin striper brush. The stark contrast catches eyes immediately across dim party rooms.
Using a dedicated detailing brush helps you control small angled curves around the eyes and mouth. I tried carving face lines with a thick wooden toothpick and ended up with a giant orange smudge across my black base. Keep your motions light and quick to keep the grin sharp and clean.
Applying a matte top coat over the black base creates a velvety blackboard texture that highlights orange pigment. I cure the black layer completely before applying orange gel to stop colors from bleeding together. The finished set gives you sturdy party nails that survive busy autumn weekends.

7. Affordable Crimson Blood Splatter Square Acrylics
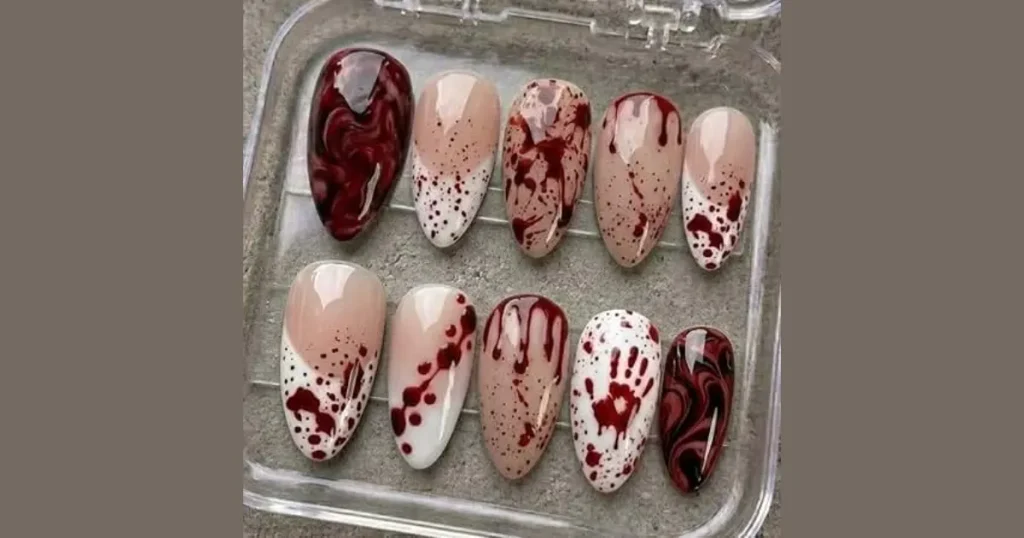
A clean bone-white acrylic background paired with bright red splashes mimics iconic vintage horror flick scenes. I paint a pure white base coat and flick diluted crimson polish across each nail using a clean plastic straw. It creates random splatter patterns without demanding painterly talent.
Taping household peel-away tape around your cuticles protects your skin from messy cleanup afterward. I forgot to protect my fingers with latex barrier tape once and spent forty minutes scrubbing red enamel off my knuckles. Peel the tape away immediately after splattering for clean borders.
A thick layer of glossy gel top coat levels out the uneven paint droplets across your acrylic surface. I always let the crimson droplets dry for five minutes before sealing so the pattern never smears. You get a dramatic horror manicure that takes under fifteen minutes to finish at home.
8. Best Neon Green Toxic Slime Acrylic Nails
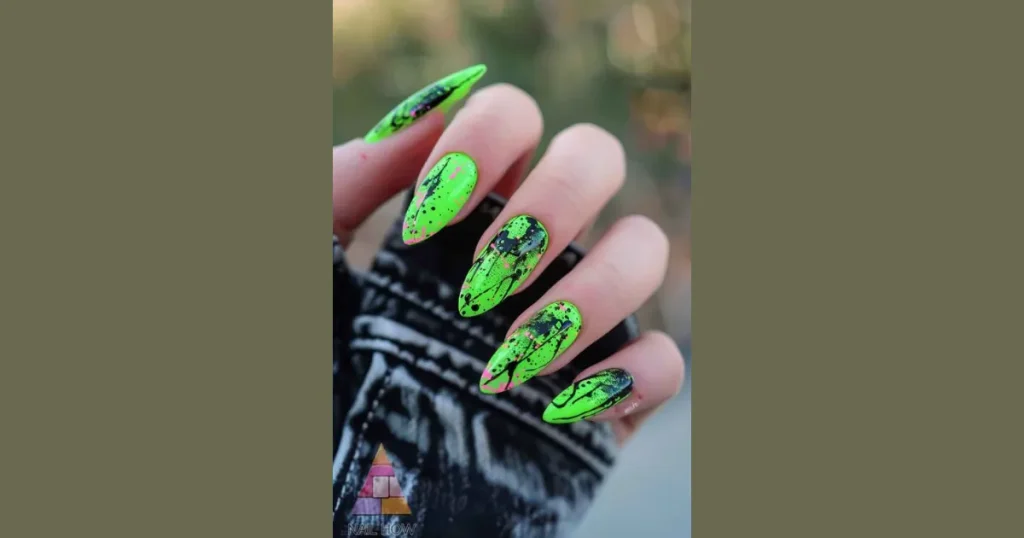
Acid green slime dripping over a glossy black acrylic base gives your manicure bold comic book energy. I apply a dark base coat and pull neon droplets downward using a round metal dotting tool. The vibrant shade catches party lights and turns your fingertips into miniature monster art.
Applying a thick gel top coat seals the raised slime ridges so they never catch against fabric. I cure each coat under my UV lamp to make sure the neon green pigment never smudges. The acrylic structure holds the design firmly through long weekends of holiday festivities.
9. Chic Celestial Gold Witchy Moon Acrylic Nails
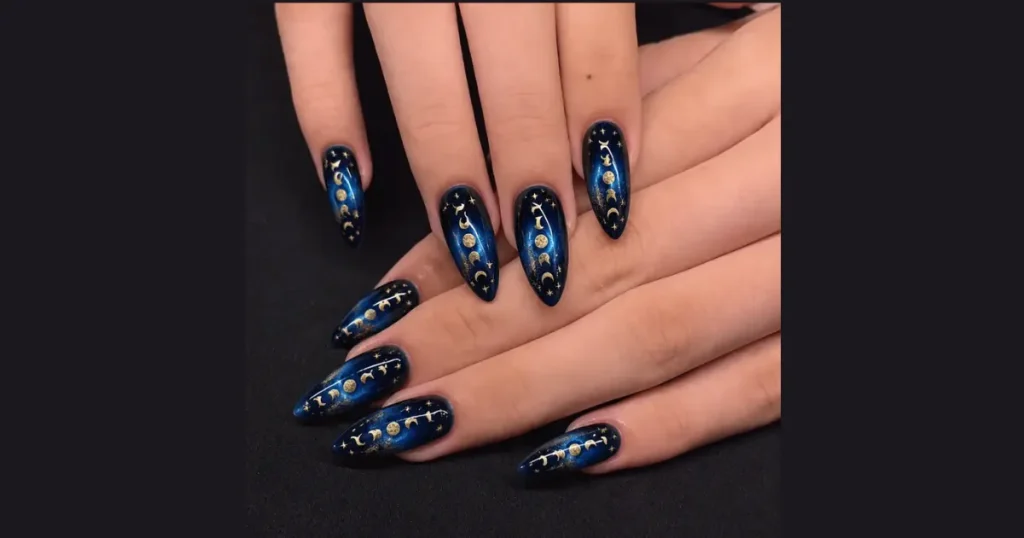
Metallic gold crescent moons placed over midnight blue acrylics deliver an enchanting mystical style. I coat my acrylic tips in deep navy lacquer before pressing golden foil decals onto the center. The rich contrast looks regal and pairs naturally with dark evening knitwear.

Fine craft tweezers help you position delicate star charms without disturbing your wet base polish. I once tried setting foil stars with bare fingers and dropped shiny flakes across my living room rug. A strong clear top coat seals the celestial metallic shapes for weeks of wear.
10. Sweet Candy Corn Ombre Acrylic Nails
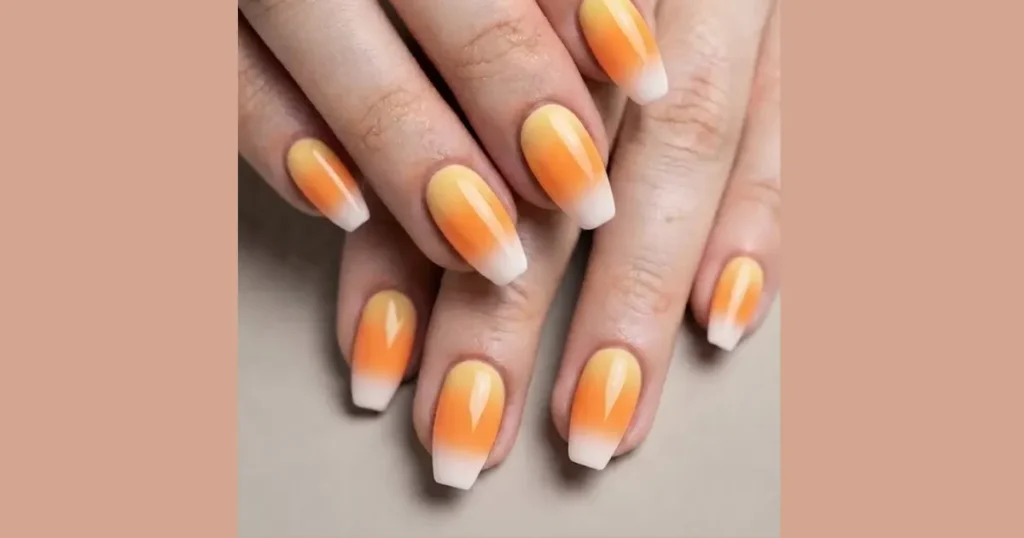
Blending cheerful yellow, pumpkin orange, and bright white produces an adorable tribute to October candy. I swipe the three colors onto a dense cosmetic wedge and press it gently onto my acrylic extensions. The smooth gradient brings cheerful autumn vibes without needing painstaking freehand lines.
Dabbing the makeup sponge in light layers prevents thick polish build-up along the acrylic sidewalls. I brush peel-off liquid barrier around my cuticles to keep the cleanup fast and tidy. A glossy clear coat blends the striped gradient into a soft, seamless finish.
11. Top Moody Velvet Vampire Cat-Eye Acrylics
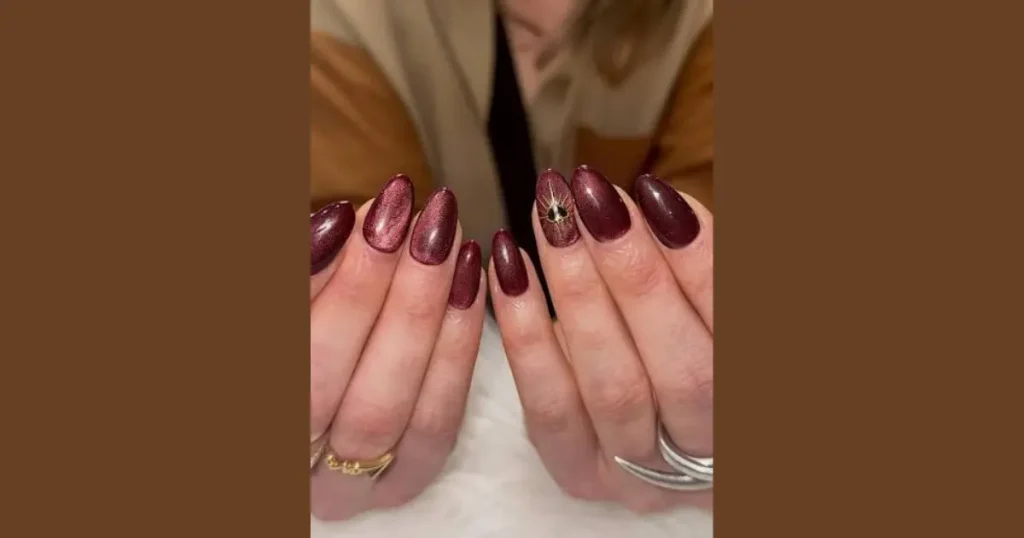
Deep burgundy magnetic gel over structured acrylics creates a rich velvet shimmer fit for a vampire queen. I hover a small rectangular magnet diagonally over the wet magnetic polish to pull shimmering iron particles forward. The gemstone effect gleams under party chandeliers and looks far more expensive than it is.
Wiping the acrylic free edge with alcohol before applying clear top coat stops any edge lifting. I cure the shiny sealant thoroughly so the velvety reflection stays bright and scratch-free. You gain a sophisticated gothic look that transitions seamlessly from office hours to evening costume events.

12. Affordable Chrome Spider Accent Acrylic Nails
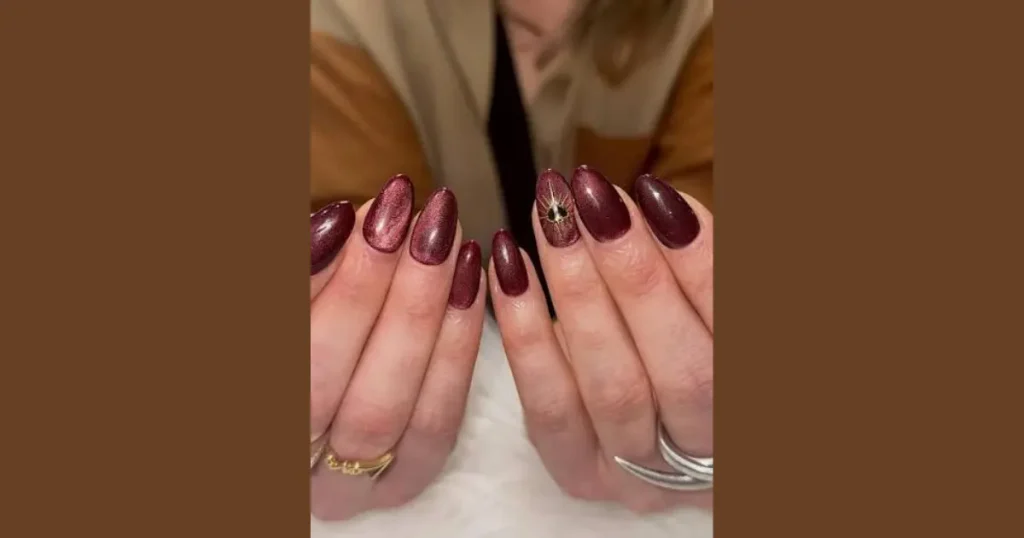
Mirror-like silver spiders painted over a matte black acrylic base provide bold metallic contrast. I draw thin arched spider legs across accent nails using a fine liner brush and silver chrome powder. The bright chrome finish reflects candlelight against the velvet background.
A soft silicone applicator helps you buff the fine chrome powder smoothly without messy glitter fallout. I ruined an acrylic set years ago by using a scratchy sponge that scuffed the black base. Sealing the spider with non-wipe top coat keeps the metallic sheen sharp for days.
13. Best Glow Skeleton Bone Acrylic Nails
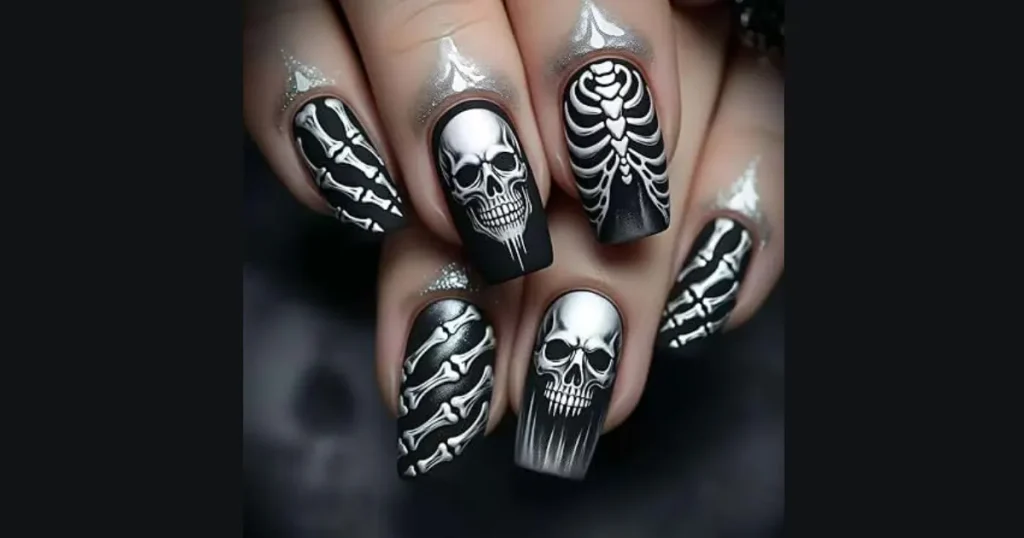
Luminescent white skeleton hand bones painted across pitch-black acrylic nails deliver genuine spooky fun after dark. I sketch simple phalange bone shapes down each finger using a fine striping brush and glow gel. The design charges rapidly under room lamps and glows brightly on evening walks.
Layering two coats of glow pigment ensures high brightness when you step into dark party rooms. I cap the acrylic tip with extra clear builder gel so the raised bone texture stays smooth. It sparks instant smiles and great conversations while waiting in front yard candy lines.
14. Chic Tortoiseshell Autumn Witch Acrylic Nails
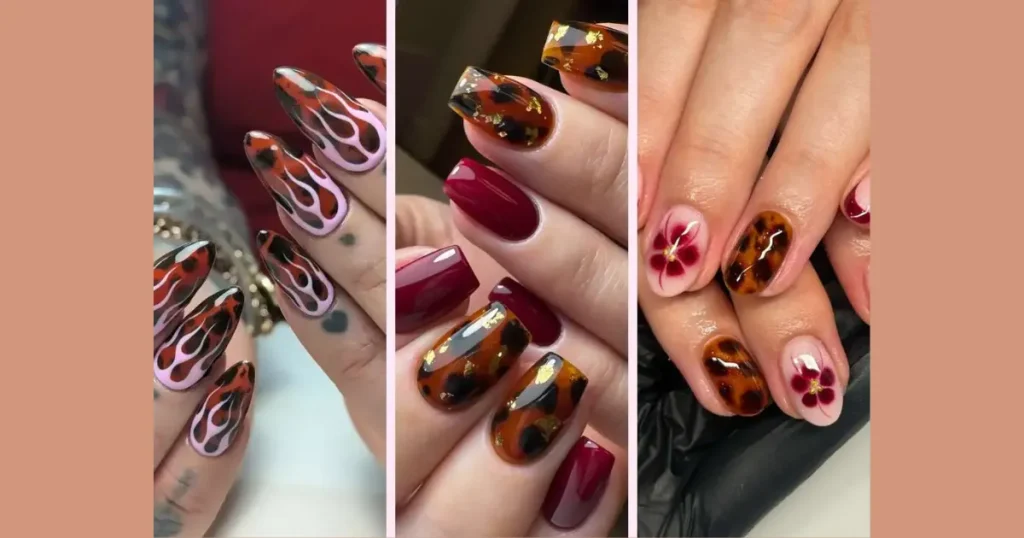
Warm amber jelly polish swirled with dark espresso spots gives your acrylics a high-end salon aesthetic. I apply a translucent caramel base and tap tiny drops of dark brown gel while the surface stays wet. The rich depth looks stunning against cozy oversized wool cardigans and warm apple cider cups.
A clear blooming gel helps diffuse the dark patches so the tortoiseshell pattern never appears blocky. I keep my detailing brush lightly moistened with alcohol to blur harsh edges between colors. The earthy autumnal aesthetic stays fashionable and flattering straight through Thanksgiving dinner.
15. Top Midnight Starry Sky Acrylic Nails
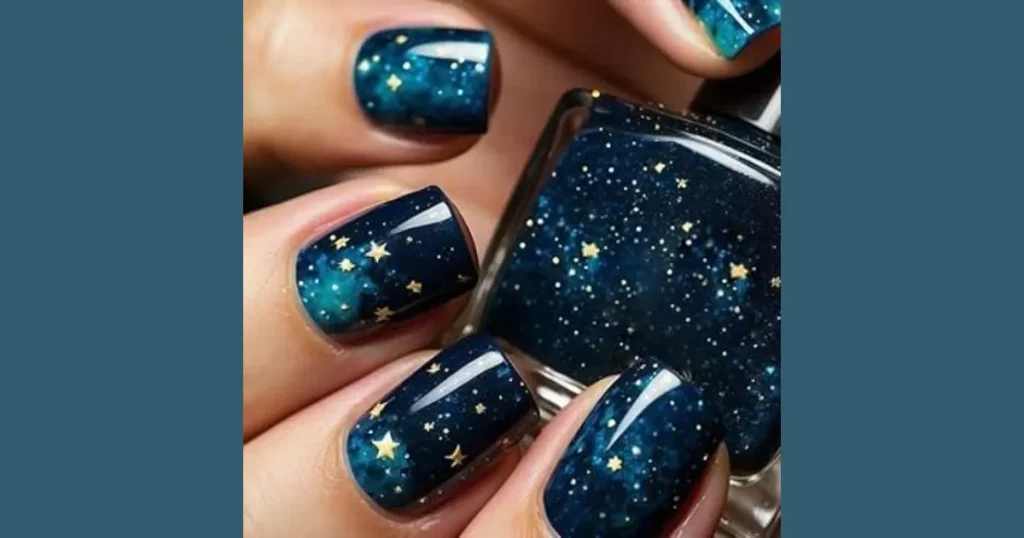
Deep navy blue acrylics sprinkled with fine gold foil stars mimic a crisp October night sky. I paint two coats of midnight blue gel before dotting tiny starbursts using a micro detailing brush. The rich celestial vibe feels mystical and pairs with cozy autumn knit sweaters.

A dusting of ultra-fine holographic glitter gives the dark base an authentic cosmic shimmer. I always seal the foil stars with two coats of clear builder gel so the sharp foil edges never catch on blankets. You walk away with a magical holiday manicure that looks upscale in every setting.
16. Affordable Gothic Black Lace Stiletto Acrylics
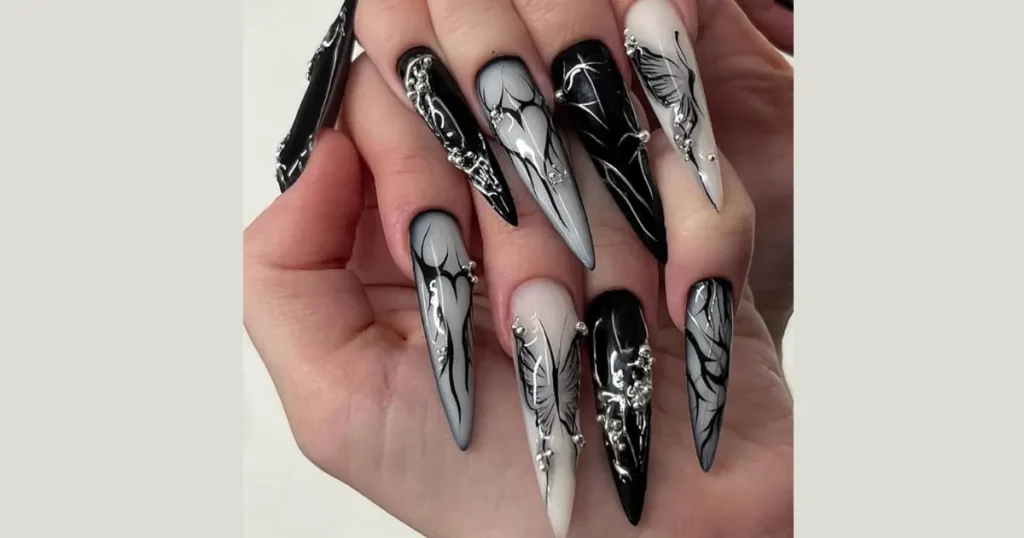
Delicate black lace patterns stamped over a sheer nude acrylic base create an elegant Victorian vampire aesthetic. I press a silicone stamper loaded with black stamping polish firmly over the center apex. The high-contrast design looks like sheer stockings and brings gothic drama to your fingertips.
A velvet matte finish softens the contrast and turns the dark lace design into vintage perfection. I wipe the sticky dispersion layer with pure alcohol before sealing to prevent any muddy gray smudging. You get an aristocratic horror look that costs very little money to recreate at home.
17. Best Textured Mummy Wrap Coffin Acrylics
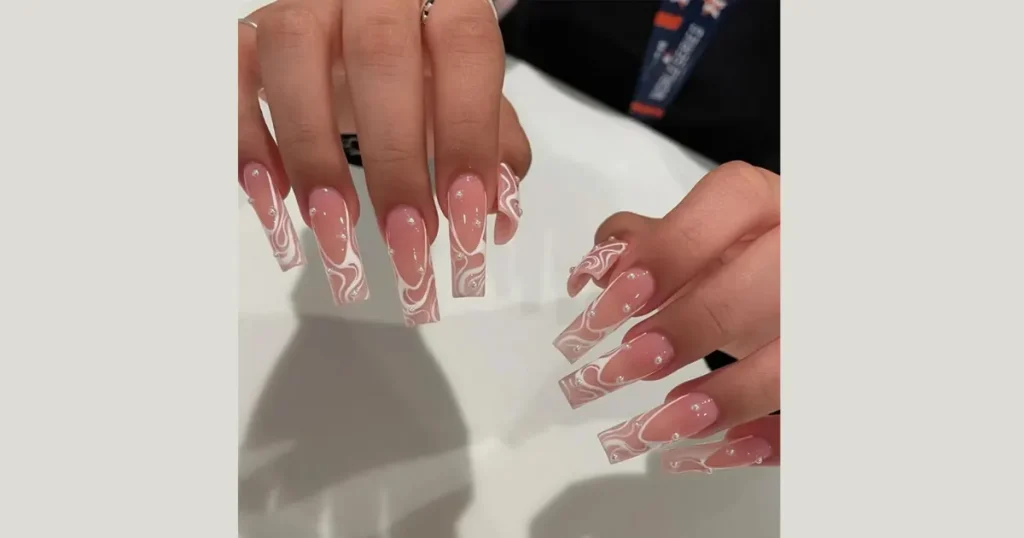
Layered white striping gel and textured matte top coat transform plain tips into spooky antique mummy wraps. I crisscross thin off-white gel lines across a light beige base, leaving small gaps for two peeking yellow eyes. The wrapped bandages look distinct and get instant laughs from friends.

The textured 3D gel polish gives the bandage strips realistic fabric depth without adding heavy weight. I love this set because minor painting wobbles look like deliberate shreds on ancient linen wraps. Your hands stay party-ready and withstand weekend chores without breaking down.
18. Chic Beetlejuice Striped Coffin Acrylics
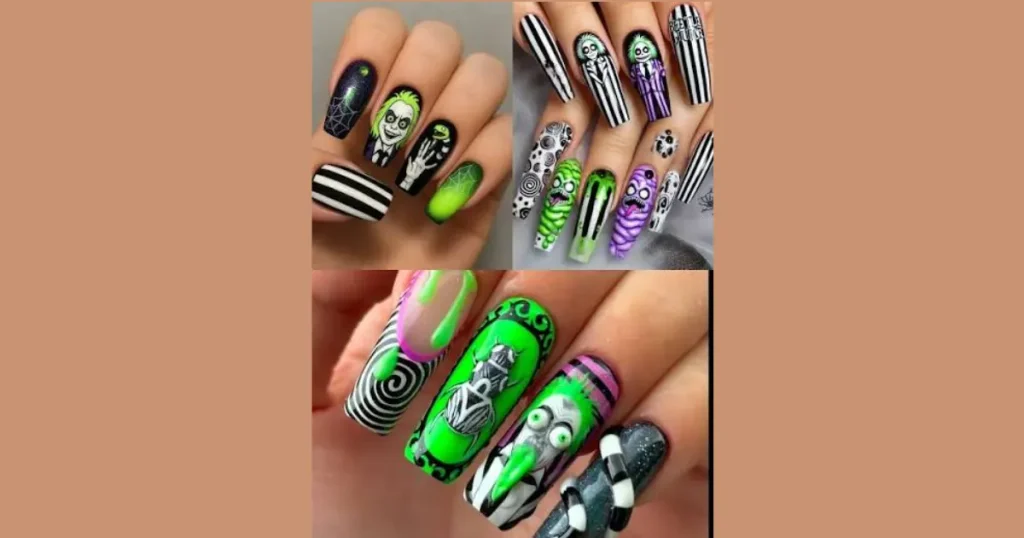
High-contrast monochrome black and white vertical stripes bring retro spooky comedy straight to your manicure. I layout thin peel-off vinyl guides across a bright white base to keep every single pinstripe straight and sharp. The energetic pattern catches the eye from across the room at lively parties.
A bright lime green accent nail adds an electric pop of color that screams classic nineties horror comedy. I top the stripes with a non-wipe glossy gel coat to keep the crisp borders from staining during cooking chores. The playful set feels nostalgic and sparks fun movie chats with other guests.
19. Metallic Poison Apple Red Chrome Acrylics
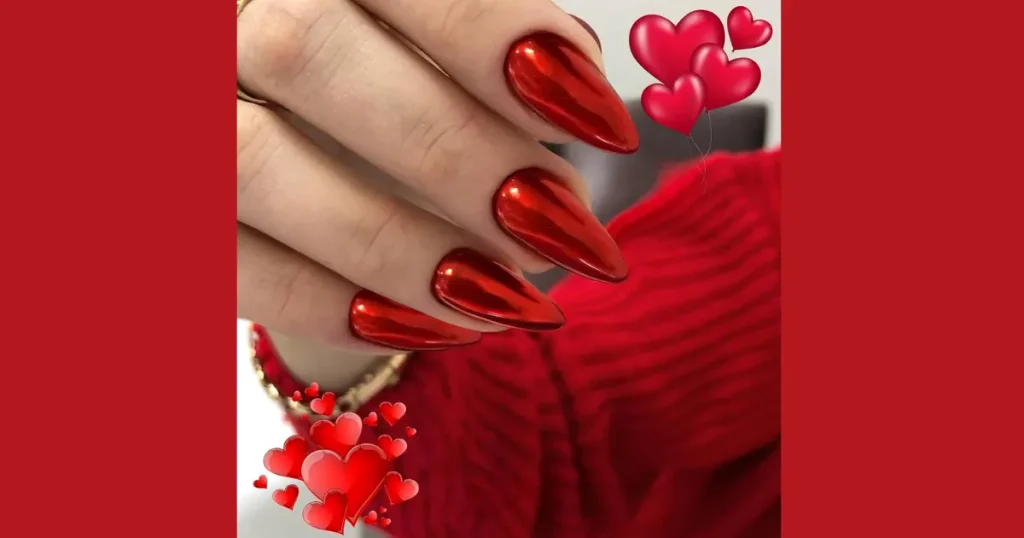
Rich metallic crimson chrome rubbed over a pitch-black acrylic base looks like a glossy fairytale poison apple. I buff fine red chrome powder directly into a warm cured no-wipe top coat with a clean silicone wand. The mirror finish gleams under evening porch lights and turns heads wherever you go.
The mirror reflection catches evening fireplace light and looks far more luxurious than basic drugstore press-ons. I cap the free edge thoroughly with hard gel so the metallic shine never wears down into black tips. You enjoy a showstopping manicure that transitions naturally into November dinner parties.

20. Mysterious Ouija Board Accent Acrylic Nails
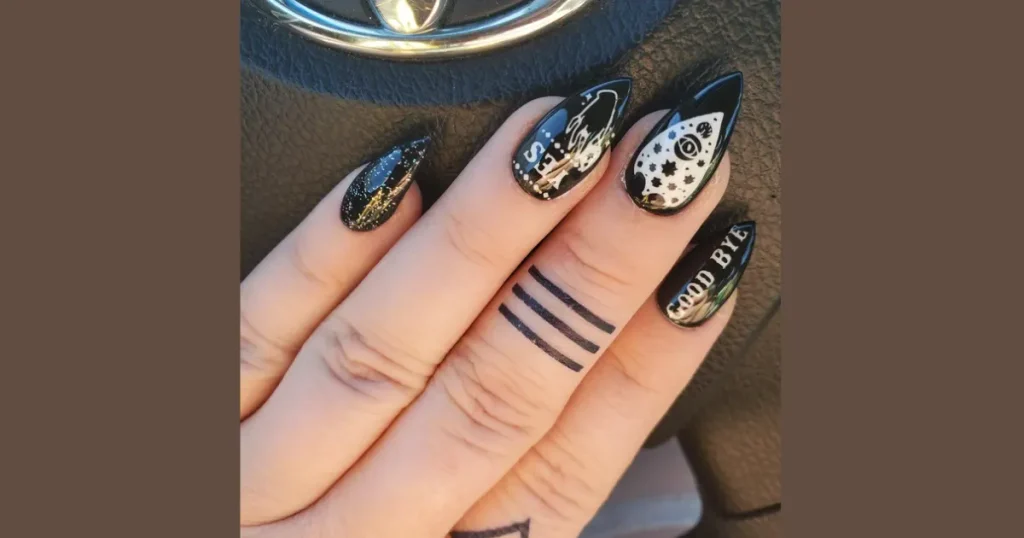
Detailed vintage planchette illustrations and gothic letters over an aged parchment acrylic base create an enchanting conversation piece. I use waterslide nail decals for the tiny alphabet lettering because freehanding vintage fonts tests my patience. The antique wooden aesthetic feels occult, mysterious, and perfect for October.
A warm sepia tint layered over ivory acrylic captures the spooky feel of an old spirit board. I secure the decals under a thick layer of smoothing top coat so the detailed design stays flawless all week. It makes a clever icebreaker while holding your party beverage near the appetizer buffet.
Practical Guide for Long-Lasting Halloween Acrylic Nails at Home
Prepping your acrylics properly prevents painful lifting and keeps festive nail art intact through November. I buff away natural shine and wipe every nail plate with pure acetone before pressing tips into place. Taking five minutes to remove surface oils helps your adhesive bond tightly for weeks of wear.
Working with thin layers of gel prevents bubbles and ensures proper curing under UV lamps. I ruined three press-on sets years ago by rushing through thick top coats that stayed sticky underneath. Two lightweight coats cure rock-hard, resist scratches, and protect your painted artwork from daily bumps.
Final Thoughts
Stunning Halloween acrylic nails give you festive confidence and complete your holiday outfits without salon bills. I love building my seasonal sets at home because it saves cash and lets my personal style shine. A well-crafted set of acrylics keeps your hands looking neat and stylish through every celebration.
Choose a design that matches your costume and lifestyle so you can enjoy every October party comfortably. Pick up your favorite polishes, practice on a spare nail tip, and celebrate the spooky season with fabulous nails. You will love hearing genuine compliments every time you reach for party snacks.

FAQs
How long do Halloween acrylic nails typically last?
A properly applied set of acrylic nails lasts between two to three weeks with sensible care. Using a quality primer and capping the free edge with top coat stops moisture from loosening the bond.
Can I apply Halloween acrylic nails at home without professional salon tools?
Yes, affordable full-cover press-on acrylics allow you to create salon-grade manicures on your dining table. You only need a buffing block, nail glue or builder gel, and a steady hand for decals.
Which acrylic nail shape works best for spooky nail designs?
Almond and coffin shapes provide great surface room for intricate artwork like cobwebs, ghosts, and blood drips. If you type frequently, short squoval acrylics provide high durability while keeping your art visible.
How do I remove Halloween acrylic nails safely without damaging natural nail beds?
Soak your fingertips in warm acetone for fifteen minutes after filing away the shiny top gel coat. The acrylic melts away gently, letting you wipe off the softened product with a wooden cuticle stick.
Can I reuse Halloween press-on acrylic nails next year?
Yes, using adhesive tabs instead of permanent liquid glue lets you remove and store the nail tips safely. Store them in a plastic organizer box away from direct sunlight so the paint stays vibrant for next October.